In 1933, Sir Alexander Fleming discovered Penicillin (by accident) as the world’s first antibiotic. It is one of the biggest discoveries in Medicine, as it is widely used in several ways – to treat wounds and infections. Since the discovery, it hasn’t been difficult to replicate, as long as the necessary ingredients are available.
Survivalists and Preppers need Penicillin like everyone else, which is why knowing how to make homemade Penicillin: Penicillin for SHTF is important. Moreover, these days, healthcare seems to be more expensive than usual; thus, people are beginning to opt for home remedies and other effective alternatives.
For a DIY Penicillin at home, you should understand that it is not an easy task – making safe Penicillin is more complex than using bread molds. Read below on the various steps and stages involved to make the antibiotic for use successfully.
How to Make a DIY Penicillin for SHTF?
On how to make Penicillin for SHTF, there are about 7 critical steps described below.
1. Isolate and Culture the Bacteria
- Use a slice or piece of bread, for instance, due to its ability to grow molds; place it in a sealed container in a dark area.
- Ensure to drill a hole in one corner to retain moisture and keep the room temperature at 70.
- With the bread in the container, add a few drops of water.
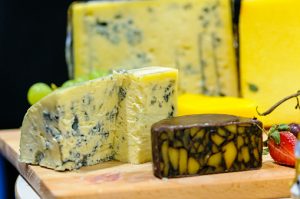
For a couple of days to weeks, consistently check for the growth of molds on the bread. It first starts with a gray-colored mold until it eventually turns bluish-green.
At this point, you have the mold suitable for making DIY Penicillin. This process of isolating and culturing is the most important stage before anything else.
2. Bacteria Re-Culture
Now that you have the bluish-green mold cultured, it confirms the presence of bacteria. While some people use this mold to treat wounds or make drinks, it is not advisable – ineffective. You have to re-culture the bacteria to get what is needed to make standard Penicillin.
- In this case, you need to make a broth.
- In an airtight sealed jar with 200g of thinly sliced peeled potato, add distilled water and boil for 30 minutes. Sieve the moisture – the broth, with a clean cheesecloth.
- In the collected broth, add 20g of glucose and agar; finally, add more distilled water until it is 1 liter in Volume.
3. Streaking
- As you proceed to re-culture the bacteria from the bread mold, pour the broth into Petri dishes and cover it properly.
- The next step is streaking, which involves collecting the bread mold into these Petri dishes.
- With a thin piece of metal or wire, sterilized perfectly in red-hot flame, and dipped into the broth, make three lines in the dish.
- Use the wire to streak the mold into these lines. This part needs to be done carefully, so it doesn’t get contaminated further.
Surviving in a situation seems like a daunting task if you don’t have all the information. We have compiled complete guides for you to follow in every situation. CLICK HERE to check them out.
4. Grow
The next part after streaking the mold into a petri dish with potato broth is the Growth Stage. Bacteria are living organisms that can grow in sizes and shapes, called colonies.
- The first step is keeping the Petri dishes covered for up to a week or more. With the help of a microscope, you should start seeing a difference in the mold – the color changes to Yellow.
- Depending on the naked eye could be quite deceptive because there are Yellow bacteria.
Nevertheless, you must know that Penicillin is Yellow. Once you see the color change, then the next phases shouldn’t be so difficult because you have what you want.
5. Fermenting
Even though you might have to do a lot more in the fermenting stage, the consolation is that you have the Penicillin ready for extraction. Before you extract, fermenting the spores helps in producing large numbers of Penicillin for use. How much you invest in this part determines the quantity you get eventually.
With a few ingredients and equipment like
- Glucose
- Aluminum Foil
- Erlenmeyer Flask
- Graduated Cylinder
- Powdered Milk
- Salt
- Yeast Extract
- and Citric Acid, you are good to go.
They are perfect alternatives to many chemical compounds like Sodium Nitrate, Potassium Monophosphate, etc., for making Penicillin SHTF.
Follow the instructions below on how to ferment:
- In a graduated cylinder, pour 1 tsp of the various ingredients you have, and add distilled water to the 100ml point.
- Sterilize the Erlenmeyer flask under heat for about an hour.
- Pour the content from the cylinder into the flask, and shake until it dissolves.
- Transfer the Penicillin from the Petri dishes into the flask and seal with an aluminum foil.
- Leave for about 10 days.
6. Extract the Penicillin
Fermentation leaves both solid and liquid states; thus, you might have to do a little bit of extraction. The liquid contains Penicillin, so you should be concerned about getting that part.
- A clean cheesecloth collects the liquid from the solid parts and stores it in a clean, sterile jar or container.
- The next step in extracting is adjusting the pH from 5 to 2.2.
- To successfully alter the pH, you will need to add a few drops of acid – preferably, Hydrochloric Acid.
7. Final Extraction
With the extraction above, you have the Penicillin ready for use. However, you may decide to go the extra mile of making pure Penicillin to use. The ingredient you need at this point is Cold Ethyl Acetate.
- In a separating funnel, mix the cold ethyl acetate and Penicillin extract and shake for about 20 – 40 seconds.
- The liquids separate – the Ethyl Acetate at the bottom, while the Penicillin extract stays at the top.
- Finally, you have the pure Penicillin ready for use.
Learn about how you can effectively use Penicillin HERE
Conclusion
With this article on how to make homemade Penicillin: Penicillin for SHTF, not only will you be able to treat wounds or infections but also spend less on healthcare. It is undoubtedly one of the best pieces of information every survivalist or prepper needs for survival. Find the right ingredients and get into making a safe antibiotic!
Tell us if you were successful in extracting Penicillin.
Check out
| Why would you want to live like a savage? What are the benefits? |
| Is it Possible to Survive Rising Sea Levels Caused by Global Warming? |
| Survival Greenhouse: Hydroponics and Aquaponics Farming |


